Integrating React into an existing application is surprisingly simple. In many cases, it is actually simpler than starting from scratch. Seriously.
#Loading React
While you’d be forgiven for thinking that React can only be used along with npm, Webpack, and an assortment of other tooling, the truth is that React doesn’t need any of this. React works great by itself.
You can actually import React into any page on your application with two simple <script /> tags. Just as you’d import jQuery.
This snippet loads React from unpkg, a CDN that lets you load NPM packages as <script /> tags.
<script src="https://unpkg.com/react@16.4.1/umd/react.production.min.js"></script>
<script src="https://unpkg.com/react-dom@16.4.1/umd/react-dom.production.min.js"></script>#Designing components
In a typical React app, your entire page’s content will be rendered by a single top-level component. For example, apps generated by create-react-app will have a top-level <App /> component.
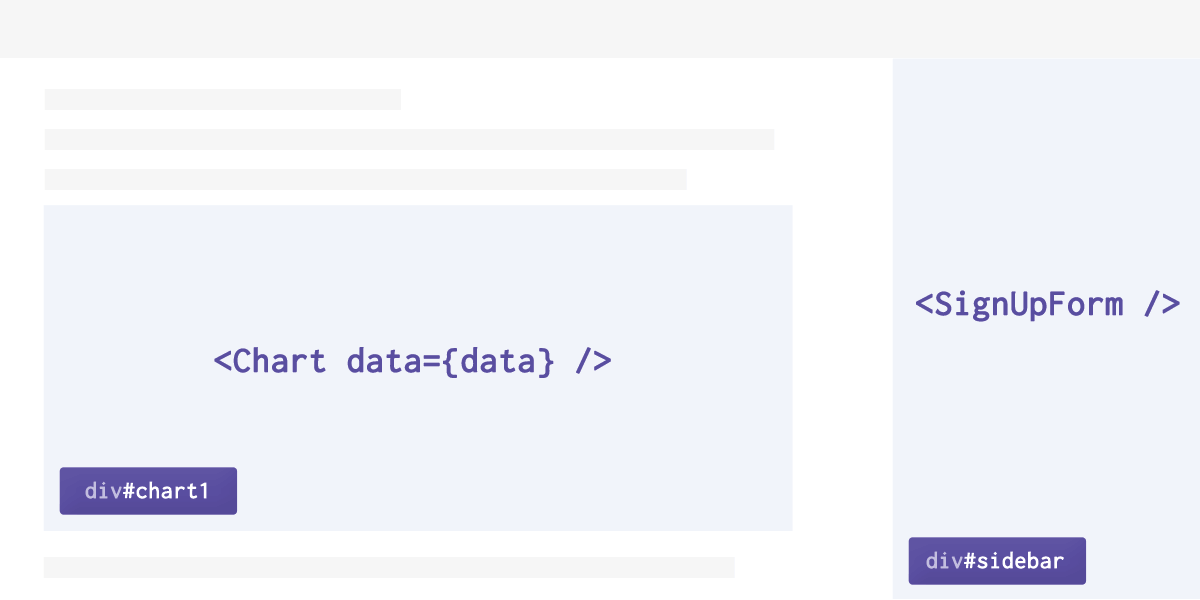
But when using React within an existing application, you’ll probably only want React to handle specific parts of each page.

In fact, both of these layouts can be implemented using exactly the same function: ReactDOM.render()
#Starting React
The ReactDOM.render() function is how you start React. More specifically, it let’s you add a React Component to an existing DOM node.
In a typical React app with a top-level <App /> element, the application will be started by rendering <App /> to a HTML element that is styled to take up the entire viewport.
This example is taken from create-react-app. See the original source on GitHub.
ReactDOM.render(
  <App />,
  document.getElementById('root')
);
Of course, React doesn’t limit you to rendering a single component that takes up the entire screen. It let’s you render as many components as you like, to whichever nodes you like.
For example, you could render a <SignUpForm pitch='Join the party!' /> element to the #sidebar div, and a <Chart data={data} /> element to #chart1:
Make sure that you don’t run this script until the elements with ids sidebar and chart1 exist! If it helps, you can call ReactDOM.render() from a window.onload handler.
ReactDOM.render(
  <SignUpForm title='Join the party!' />,
  document.getElementById('sidebar')
);

const data = [[1, 0.1], [2, 0.5], [3, 0.3]];
ReactDOM.render(
  <Chart data={data} />,
  document.getElementById('chart1')
);
Did you notice how the data prop in the above example is just defined as a normal variable? Keep in mind that React code is Just JavaScript, and ReactDOM.render() is just a JavaScript function.
Once you’ve rendered a React Element to a DOM node, React will be in charge of managing that node’s children. If the component’s state changes due to an event, a network call, a Redux action, or any other reason, React will automatically update the DOM.
But what if you want to make some changes to the rendered element from the outside?
#Don’t touch React markup
If you start modifying the DOM manually, React will lose track of the current state of the world, and will start doing funny things. If your application is important, these funny things will make you cry.
Do not manually change DOM nodes that were rendered by React.
Of course, your application can still communicate with your React components; you’ll just need to do so by passing in new props to your React Elements with ReactDOM.render(). For example:
For more details on ReactDOM.render(), you can see my lesson on How ReactDOM.render() works.
// The first call to `ReactDOM.render()` creates appropriate DOM nodes
ReactDOM.render(
  <Chart data={[[1, 0.1], [2, 0.5], [3, 0.3]]} />,
  document.getElementById('chart1')
);

// The second call to `ReactDOM.render()` just updates the props
ReactDOM.render(
  <Chart data={[[1, 0.1], [2, 0.5], [3, 0.3], [4, 0.2]]} />,
  document.getElementById('chart1')
);
You can even pass in callback functions as props, allowing your components to communicate with your existing application code.
#What about JSX?
If your app is using Babel already, you’ll just need to add the appropriate preset to your .babelrc.
Your browser doesn’t understand JSX. It only understand vanilla JavaScript. And if you’re not using Babel or Webpack to compile your existing JavaScript code, you won’t be able to use JSX.
Luckily, you don’t need to use JSX.
The thing about JSX is it is just a shorthand way of writing React.createElement(). If your application doesn’t use Babel, you can still manually write out React.createElement().
For example, here is the above code example, but with JSX elements converted into React.createElement() calls:
See how JSX maps to JavaScript in The 6 rules of JSX: a live cheatsheet.
ReactDOM.render(
  React.createElement(SignUpForm, { title: 'Join the party!' }),
  document.getElementById('sidebar')
);

const data = [[1, 0.1], [2, 0.5], [3, 0.3]]
ReactDOM.render(
  React.createElement(Chart, { data: data }),
  document.getElementById('chart1')
);
Of course, even if you haven’t got a build system, you can still use JSX! You’ll just need to make sure you compile it to JavaScript before it hits the browser.
The best way to build JSX into JavaScript this will depend on the platform you’re using. But you’ll always have the option of using a Webpack-based build system and plonking the output JavaScript files in your public directory. After all, React is just JavaScript.
#TL;DR
React can be integrated into an existing application. Just remember:
- Render individual components, not an entire application.
- React is in charge of React’s markup. Don’t touch it.
ReactDOM.render()adds your elements to a DOM node, and can also update their props.- Your components can communicate with your app via callbacks.
- Don’t use JSX in code that is sent to the browser.

