Create React App
While browsers have come a long way in the last few years, there’s still a bunch of things that they don’t do so well. They:
- Can’t
importpackages reliably - Don’t provide a good way to import styles alongside your components
- Can’t compile JSX performantly
- Don’t support the latest ESNext features
Sure, it’s possible to patch together an app with <script> tags and HTML files, but it automatically means you miss out on all of the above. And even if you do manage to make it work at the start, as the project grows it’ll quickly become hard to manage.
To smooth out these problems, most modern apps have a build system: a piece of software which takes the app’s source files, and processes them into distrituable files that can be run directly by the browser. And of all the build systems I’ve seen, Create React App is by far the simplest. It’s configuration-free, it supports JSX, and as a bonus it’s also maintained by Facebook (like React itself).
Throughout this course, a number of examples require a build system. As it so happens, the editor actually includes a build system — so it’s entirely possible to complete the examples without ever leaving your browser! But say that you do want to try the examples in your own editor. In that case, the simplest way to do so is with Create React App — so let’s see how to set it up.
#Prerequisites
There’s a few things to check before you start.
I’m assuming that you’re already familiar with command line basics like
lsandcd.You’ll need to have a recent version of Node.js installed. You can check this by running
npx nyancatfrom your terminal — if you see a rainbow, then Node.js is up to date.
Ready to go? Then let’s dive in!
#Generating a project skeleton
We’ll start by asking Create React App to create a project skeleton.
$ npm init react-app skynetCalling this command will create a bunch of files in the skynet directory. There’s a bit of magic going on, so let me explain.
The first two words in the above shell command — npm init — are often used by themselves to create a new package.json file. But the third word — react-app — tells npm to looks for a package whose name ends with react-app, but begins with create- — and to use that package to initialize the project instead. As a result, npm looks for the create-react-app package, then downloads it and uses it to create the skynet directory.
TypeScript Hint
Create React App also supports TypeScript. And while I won’t be covering TypeScript in this course, if you’re already familiar with it then you can ask Create React App to generate the project skeleton with TypeScript by passing in a final --typescript option.
$ npm init react-app skynet --typescript#Start the development server
Now that you’ve initialized a project skeleton, let’s start it up by changing into the project directory and calling npm run start.
$ cd skynet
$ npm run startIf everything is working, this should start a development server, and open your browser to a page that looks something like this:
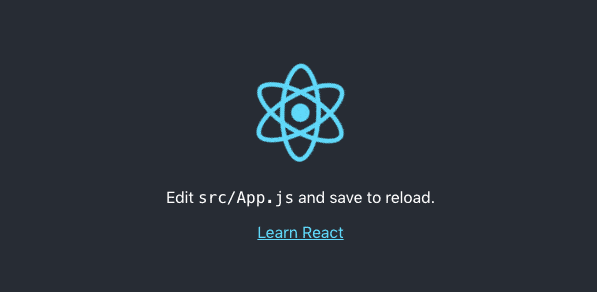
#Make a change
As you can see, React is asking you to edit src/App.js, so go ahead and change the text to something hilarious, and then save the file. For now, don’t worry too much about how all this works — we’ll be covering it over the next couple sections.
Done? Great! Did you notice how when you saved the file, the browser reloaded your app with the new text? You are actually following along in your own terminal, right? Great! That means that you’ve built your own brand new app! And to celebrate, let’s take a look at the most important file.
#src/index.js
If everything has gone right, then you should now have a file called index.js. This is your app’s entry point, and it should look something like this:
import React from 'react';
import ReactDOM from 'react-dom';
import './index.css';
import App from './App';
import * as serviceWorker from './serviceWorker';

ReactDOM.render(<App />, document.getElementById('root'));
// If you want your app to work offline and load faster, you can change
// unregister() to register() below. Note this comes with some pitfalls.
// Learn more about service workers: https://bit.ly/CRA-PWA
serviceWorker.unregister();
See the highlighted line? Pretty familiar, right? The only difference from what you’ve already seen is that React is rendering a custom element type — which we’ll cover in the next section.
As for the rest of the file, there’s two things going on. First, there’s the service worker stuff. This is completely unnecessary. You can just delete it. Then, there’s the import statements — and we’ll learn more about them in the next lesson! See you there.